How do I configure DNS for multiple domains?
Setting up DNS (Domain Name System) for multiple domains might seem tricky, but with the right steps, you can manage it efficiently.
This guide will walk you through the process in a simple and easy-to-understand way.
Understanding DNS Basics
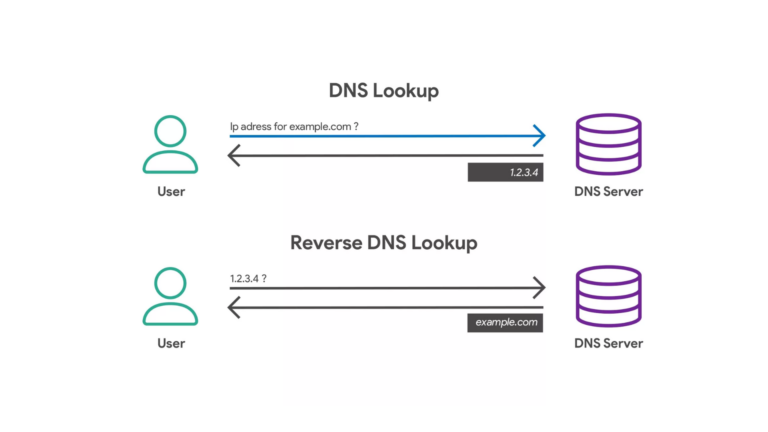
DNS is what translates a domain name (like example.com) into an IP address (like 192.168.1.1). Every time someone visits your website, their browser uses DNS to find where your site is hosted.
If you have multiple domains, you need to configure DNS for each one properly so they work as expected.
Steps to Configure DNS for Multiple Domains
1. Choose a DNS Hosting Provider
You need a reliable DNS hosting provider to manage your domains. Some popular ones include:
- Cloudflare
- Google Domains
- GoDaddy
- Namecheap
- AWS Route 53
Most domain registrars offer DNS hosting, but you can also use third-party DNS services.
2. Add Your Domains to the DNS Provider
Once you have a DNS hosting provider, follow these steps:
- Log in to your DNS provider’s dashboard.
- Look for an option to add a new domain.
- Enter the domain name and confirm.
Repeat this step for every domain you want to configure.
3. Update Nameservers
To make sure your domains use the new DNS provider, update the nameservers:
- Log in to your domain registrar (where you bought the domain).
- Go to DNS Settings or Nameserver Settings.
- Replace the existing nameservers with those given by your DNS provider.
- Save the changes (it may take a few hours to update worldwide).
4. Configure DNS Records
For each domain, you need to set up DNS records to make the domain work correctly.
Important DNS Records:
- A Record – Points your domain to an IP address.
- CNAME Record – Alias for another domain (useful for subdomains).
- MX Record – Handles email routing.
- TXT Record – Used for verification and security.
- NS Record – Specifies the authoritative nameservers.
To add these records:
- Go to your DNS provider’s dashboard.
- Select the domain you want to configure.
- Add the required records and save changes.
5. Set Up Subdomains (If Needed)
If you need subdomains (like blog.example.com), follow these steps:
- Go to DNS settings for your main domain.
- Add a new A Record or CNAME Record with the subdomain name.
- Point it to the correct IP address or another domain.
- Save the settings.
6. Test Your DNS Configuration
After setting up everything, test if the DNS settings are correct:
- Use DNS Checker (https://dnschecker.org) to verify if changes have propagated.
- Use the ping or nslookup command on your computer to check if the domain resolves correctly.
Managing Multiple Domains Efficiently
Handling multiple domains can become messy. Here are some tips to stay organized:
- Use One DNS Provider – Managing all domains from one dashboard makes things easier.
- Keep a Record of DNS Settings – Save a document with details of each domain’s DNS records.
- Enable Auto-Renewal – This prevents your domains from expiring by accident.
- Monitor DNS Propagation – Changes take time to update globally, so be patient.
Conclusion
Configuring DNS for multiple domains is straightforward once you understand the process. By choosing a good DNS provider, setting up the correct records, and keeping track of your settings, you can ensure that all your domains work smoothly.
If you ever get stuck, most DNS providers have help guides or customer support to assist you.